Upstream+ can connect directly to Quorum ODA Data Hub so an organization can retrieve its LOS accounting data without repeatedly exporting and uploading files manually.
The Data Hub integration is configured separately for each Upstream+ organization. Once connected, authorized users can preview the latest ODA data and import new or changed records into Upstream+.
Before You Begin
You will need the organization’s Quorum ODA Data Hub connection information:
- Hostname
- Database Name
- Username
- Password
These should be credentials with the appropriate read access to the organization’s Quorum ODA Data Hub database.
If you do not have these values, contact the organization’s Quorum/ODA administrator or IT/database administrator before continuing.
Step 1: Open the Organization in Upstream+
Log into Upstream+ and make sure you are working inside the organization you want to connect.
The Data Hub connection is organization-specific, so repeat these steps for each ODA client that needs to be connected.
Step 2: Open LOS Settings
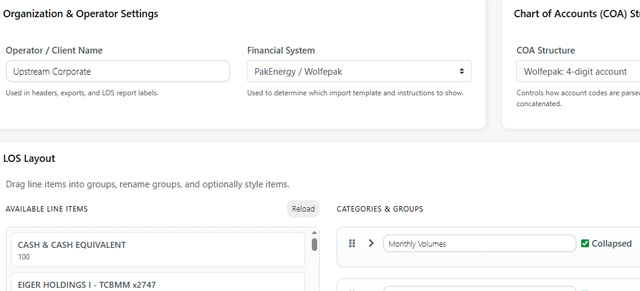
Navigate to the organization’s LOS Settings.
Locate the section titled:
Connect directly to Quorum / ODA Data Hub?
The connection status will display as Not Connected if no working Data Hub connection has been configured.
Step 3: Select Connect Data Hub
Click Connect Data Hub.
The Connection Details panel will open.
Enter the following information:
Hostname
Enter the hostname or server address used to access the client’s Quorum ODA Data Hub database.
Database Name
Enter the exact database name for that ODA organization.
Username
Enter the username authorized to access the Data Hub database.
Password
Enter the password associated with that username.
The password is required when testing a new connection.
Step 4: Choose the Sync Cadence
Under Sync Cadence, select one of the following:
Manual Only
Data is retrieved only when an authorized Upstream+ user manually initiates a preview or import.
This is a good option when first configuring a customer or when the organization wants direct control over when its ODA data is retrieved.
Daily
The organization is configured for a daily synchronization cadence.
Use this option when the customer’s Data Hub connection has been validated and regular synchronization is desired.
Step 5: Test and Save the Connection
Click Test and Save.
Upstream+ will attempt a read-only connection to the client’s Quorum ODA Data Hub database using the information you entered.
If successful, the connection will be saved for that organization and its status will change to Connected.
If the connection fails, verify:
- Hostname
- Database Name
- Username
- Password
- That the Data Hub database is accessible
- That the supplied user has permission to read the required ODA data
Correct the information and click Test and Save again.
Do not move on to the synchronization steps until the connection displays as Connected.
Step 6: Open Sync Data
After the connection is successful, click Sync Data.
Two primary actions are available:
- Refresh Preview
- Append/Import
Step 7: Refresh the Data Preview
Click Refresh Preview before importing.
Upstream+ connects to the client’s ODA Data Hub and retrieves a preview of the available data and changes.
The preview allows you to inspect the information before committing it to the organization’s LOS data.
Depending on the organization’s ODA configuration, the integration can retrieve information used for:
- Chart of Accounts
- Well information
- AFE information
- ODA LOS / General Ledger data
The preview is informational. Loading a preview does not itself import the data.
Step 8: Review the Preview
Review the Data Preview tables for the organization.
Confirm that the expected ODA information is being returned.
If the data does not look correct, do not import it yet. First confirm that:
- You connected to the correct ODA database.
- The correct client organization is open in Upstream+.
- The ODA credentials have access to the expected data.
Step 9: Append/Import the ODA Data
When the preview looks correct, click Append/Import.
Upstream+ will queue the ODA Data Hub information through the existing LOS import process.
The system handles the retrieval and import in the background and processes the applicable changes for the organization.
Upstream+ uses the organization’s ODA configuration, including the ODA Main/Sub account structure, when processing the incoming information.
What Happens on Future Syncs?
The Data Hub integration is designed to retrieve and process new or changed information rather than requiring the entire database to be manually exported and uploaded every time.
After the initial connection and import, use Sync Data to retrieve subsequent ODA changes.
For organizations configured for daily synchronization, the saved connection supports the organization’s regular Data Hub synchronization process.
Do I Still Need the Manual ODA Upload?
The Data Hub integration is an optional enhancement to the existing ODA workflow.
It does not remove Upstream+’s existing ODA template/import capability.
Manual uploads can still be used when needed. The Data Hub connection provides a faster way to retrieve ODA information directly while preserving Upstream+’s existing LOS validation and import process.
Connecting Additional ODA Clients
Each ODA client must be connected within its own Upstream+ organization.
For every additional client:
- Open that client’s organization in Upstream+.
- Go to LOS Settings.
- Select Connect Data Hub.
- Enter that client’s Hostname, Database Name, Username, and Password.
- Select the desired sync cadence.
- Click Test and Save.
- Confirm the status changes to Connected.
- Open Sync Data.
- Click Refresh Preview and verify the returned information.
- Click Append/Import when the preview is correct.
Do not reuse another client’s database information unless those organizations intentionally share the same Quorum ODA database and credentials.
Troubleshooting
Authentication Failed
Verify the hostname, database name, username, and password.
Also verify that the account has permission to access the ODA Data Hub database.
Sync Data Is Disabled
The organization does not currently have a validated connection.
Open Connect Data Hub and successfully complete Test and Save first.
Preview Does Not Show Expected Data
Confirm that you are:
- In the correct Upstream+ organization.
- Connected to the correct ODA database.
- Using credentials with access to the expected client data.
Refresh the preview again after correcting the connection.
I Changed the Connection Information
Open Manage Connection, update the appropriate values, and run Test and Save again before performing another synchronization.
I Need to Remove the Connection
Open Manage Connection and choose Delete credential.
This removes the organization’s saved Data Hub credential. A new connection must be tested and saved before Data Hub synchronization can be used again.
Important
Preview first, import second.
Whenever a new ODA client is connected, verify the returned Data Hub information with Refresh Preview before performing the first Append/Import.